Watch it draw itself · tap to replay
How to Draw a Bird Flying
Draw a bird flying in 10 easy steps, about 8 minutes. Free, with a printable worksheet.
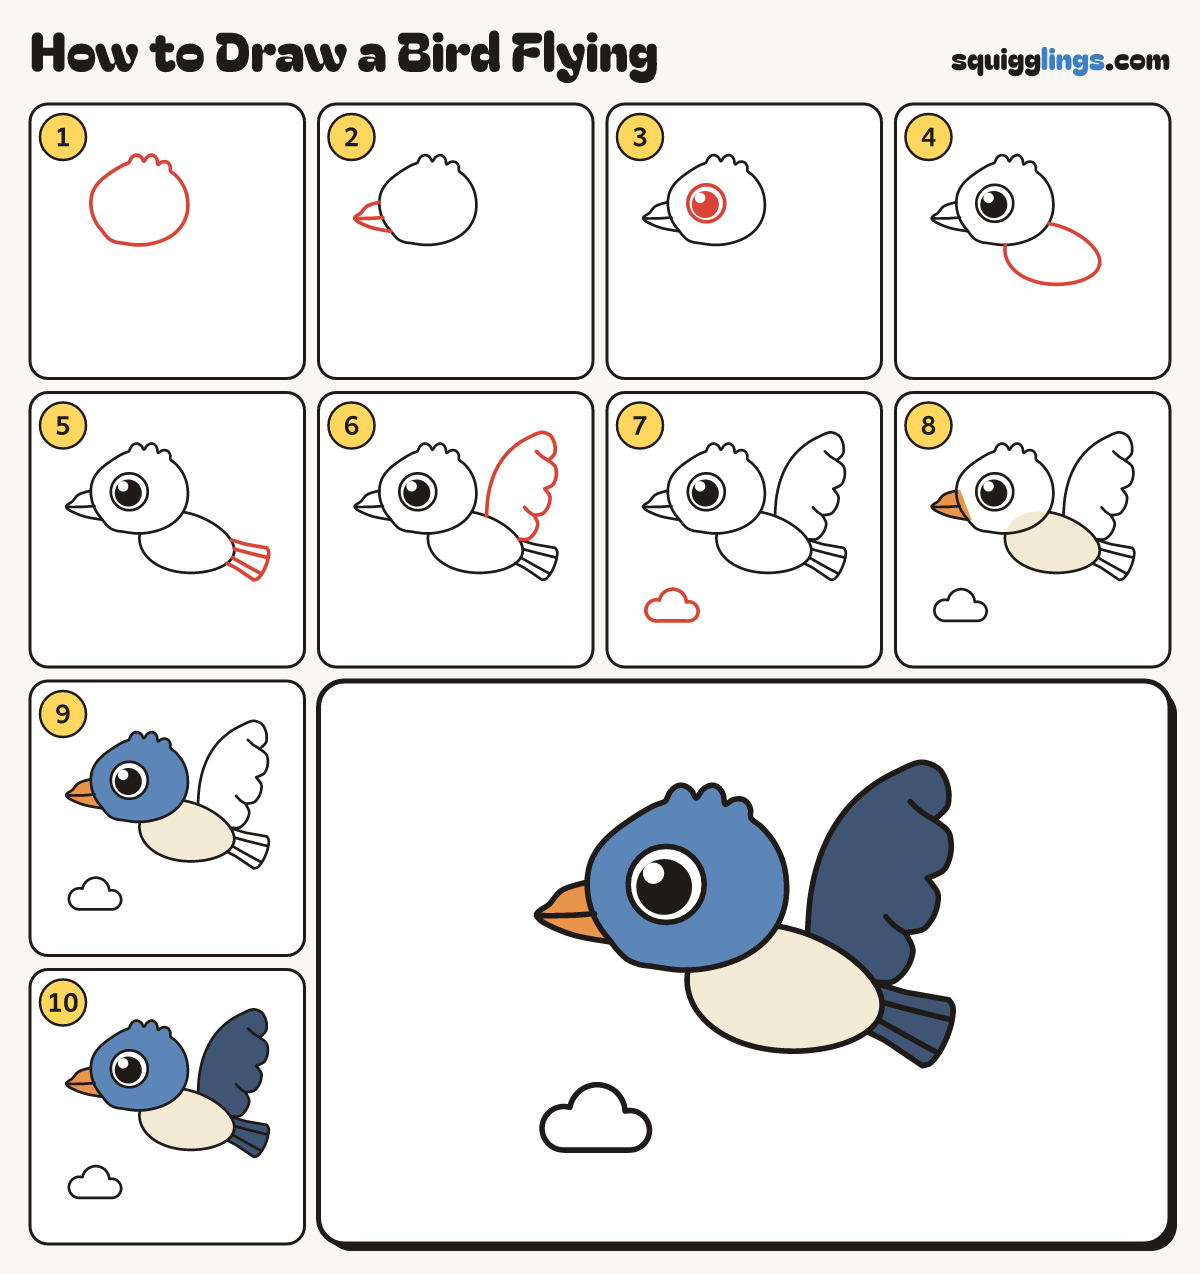
Each picture adds one red line. Draw that line, then scroll to the next picture. Rub out any dashed helper lines at the end. First up: the head.
Step 1: The head
Near the top left draw a big round head, wider than tall. Add a chin bump and a 3-puff tuft.
Tip The tuft is 3 gentle hills on top toward the back, not spikes.
Step 2: Stubby beak
From the head's front draw a short fat beak pointing left, back to the head. Add a mouth line.
Tip Keep the beak short and fat, about as tall as it is long.
Step 3: One big eye
Behind the beak draw a big eye. Fill it with a black dot, leaving a white speck shine.
Step 4: Plump body
From the head's back draw a long bean body, sloping down to a round end, then under to the chin.
Tip Let the body lie along behind the head like a bean, not hang under it.
Step 5: Fan tail
From the body's end draw a fan tail out behind and back to the body. Add 2 feather lines.
Step 6: Open wing
Start on the back behind the head. Draw a big wing up high, then 4 round bumps back down.
Tip The wing tip goes up higher than the head.
Step 7: A puffy cloud
Near the bottom left draw a little cloud: 3 round puffs on top and a flat bottom.
Step 8: Cream tummy, orange beak
Colour the body cream, from the chin to the tail. Colour the beak orange.
Step 9: Blue head
Colour the head blue, leaving the eye white.
Step 10: Navy wing and tail
Colour the big wing and the fan tail navy, a darker blue. Leave the cloud white.
Your finished drawing
Follow the steps above and this is where you end up: a bird flying, drawn by you.
Every step in one picture