Watch it draw itself · tap to replay
How to Draw a Frilled Lizard
Draw a frilled lizard in 12 easy steps, about 9 minutes. Free, with a printable worksheet.
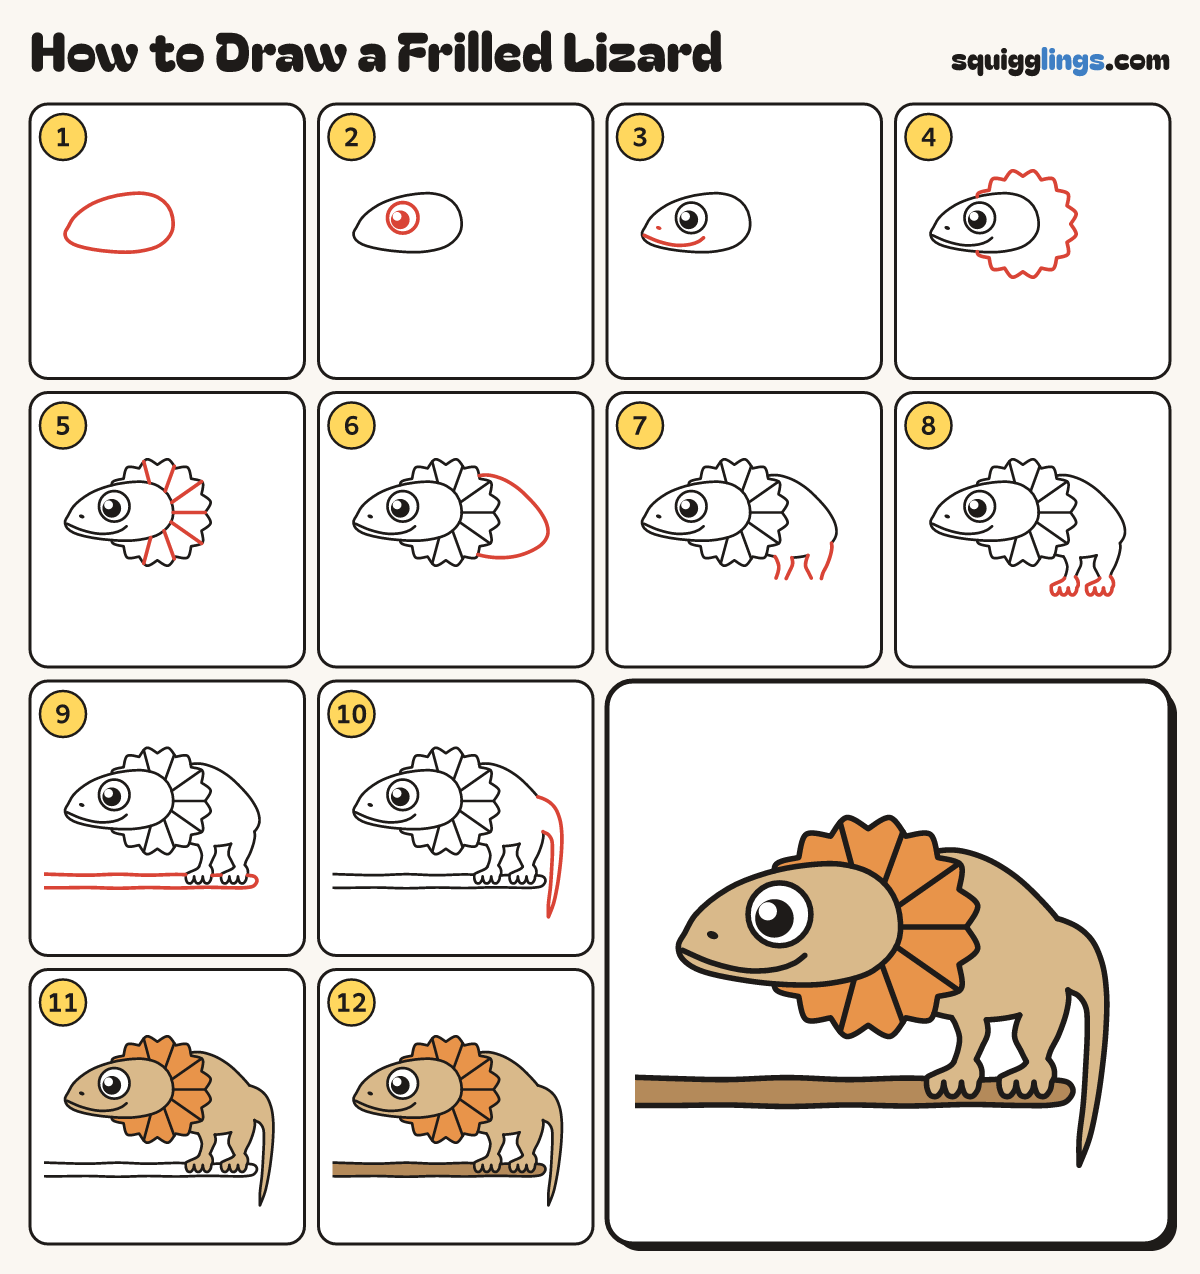
Each picture adds one red line. Draw that line, then scroll to the next picture. Rub out any dashed helper lines at the end. First up: wedge head.
Step 1: Wedge head
On the left of your paper, draw a long rounded wedge head lying on its side, nose on the left.
Step 2: Big eye
In the front half of the head, draw 1 big circle eye. Add a big black pupil and a shine.
Tip The pupil is more than half the eye.
Step 3: Grin and nostril
From the nose, draw a long grin back under the eye, curling up at the end. Dot a tiny nostril.
Step 4: Big ruff
Round the neck, draw a big collar of bumps, much bigger than the head. The head pokes out of it.
Tip Lift your pencil where the head covers the ruff.
Step 5: Ruff folds
Inside the ruff, draw straight fold lines fanning out from behind the head, like the ribs of an umbrella.
Step 6: Slim body
Start high on the ruff. Draw a low hump back, down to a round bottom, and forward to the ruff.
Step 7: Two bent legs
From the tummy, draw a bent front leg and a bent back leg, down to the ankles.
Step 8: Three-toed feet
At the bottom of each leg, draw a flat foot with 3 round toes at the front.
Step 9: The branch
Start at the left edge. Draw a wavy branch behind the toes, round the end, and back to the edge.
Step 10: Long tail
Start on the back. Draw a long tail sweeping down past the branch end to a point, then back.
Tip A lizard tail is as long as the whole body.
Step 11: Tan lizard, orange ruff
Colour the head, body, legs, feet and tail tan. Leave the eye white. Colour the whole ruff orange.
Step 12: Wood branch
Colour the branch wood brown. Your frilled lizard is done!
Your finished drawing
Follow the steps above and this is where you end up: a frilled lizard, drawn by you.
Every step in one picture